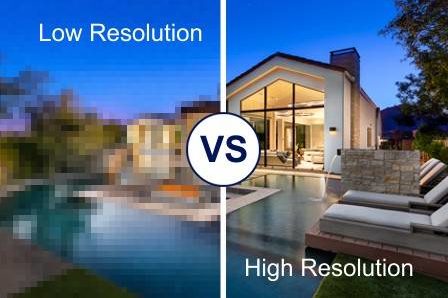
“Can’t you just use the photos from the MLS?”
That’s probably the most common question we get whenever someone is ordering a listing flyer or brochure for the first time. The quick answer is “No,” but there’s some explaining that needs to happen.
A typical MLS photo is 1,024 pixels wide (which is only 3.5 inches when printed).
You can see why that’s a problem. If a flyer is 8.5″ wide, there’s no way to fill that with a 3.5″ wide photo. It’s simply too small. If we try to enlarge it by stretching it to size, it becomes blurry and pixelated like the image at the top of this page.
It’s sometimes possible, however, to use those images for “inset” photos, but never as main photos.
If you look at the image to the left (or above depending on device), you’ll see an example of an inset photo that’s roughly the same size as a typical MLS photo (approximately the size of a standard business card). So although MLS photos may look somewhat large on your computer or iPad, they will not scale very well when we’re talking about print materials.
Oh… also, resolution applies to things like your own personal photo or logos too! Everything must be in high resolution.
Okay, so how do I know if a photo is low resolution or high resolution?
(It’s easy…we’ll show you!)
First, open Windows File Explorer (or if using Apple, open File Manager). Navigate to the folder where your image is stored, and hover your cursor over it. A small popup will appear and will have all the details you’ll need to know whether your photo is low or high resolution.
The numbers we’re most interested in are the ones in the parentheses (6,732 x 4,479) inside the smaller rectangle. Those numbers show how wide and tall the photo is in pixels. All you have to do is divide the first number by 300 (that’s how many pixels are in an inch when printed). Whatever your answer is equals the number of inches wide that particular photo is.
In this case, 6,732 divided by 300 = 22.44 inches wide, which is definitely high resolution, and can easily be used anywhere on a flyer or brochure! By the way, when designing your project, we can always shrink an image down, but we can’t enlarge it without it becoming blurry and pixelated. The photos in the example above are perfect!
NOTE: Be careful when saving images!
For the real technical nerds out there (like us!)… there’s one more thing to be careful of. You can have an image the same size as the one in the example above, and it still might be low resolution. How?
When people open a JPG image on their computer and then save it again (instead of simply closing it), many programs will compress the image to something like 80% in order to reduce the file size.
So let’s say your photo was originally 100% quality, but on Tuesday you saved it and it dropped to 80%. Then Wednesday you did it again. 80% of 80% means the image is now at 64% of its original quality. Do it one more time and it drops to HALF of its original quality — even though it’s still the same width and height.
To keep your images the highest quality, we always recommend that if you ever open and save them, either rename them or save them to a different folder. That way, the original is always still at 100%.
If you have questions about any of the above, just give us a call. We’d be happy to walk you through it!

